
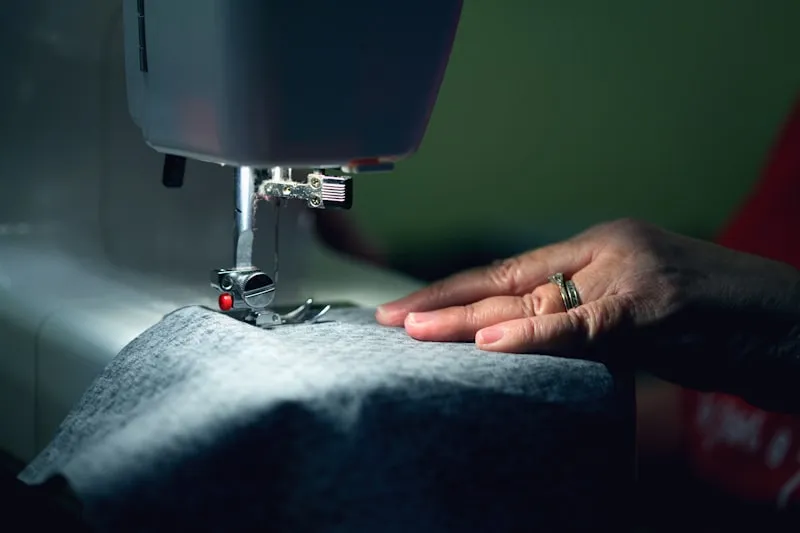
If you’ve ever opened the accessory box that came with your sewing machine, you’ve probably been greeted by a confusing array of small metal attachments. These are presser feet, and understanding what presser foot to use can transform your sewing from frustrating to fantastic. This comprehensive sewing machine presser feet guide will walk you through the essential types of presser feet every beginner needs to master their craft.
What Is a Presser Foot and Why Does It Matter?
A presser foot is the metal or plastic attachment that sits beneath your sewing machine needle and holds fabric flat against the feed dogs as you sew. The right presser foot doesn’t just hold fabric in place—it guides, shapes, and controls your material to create professional results that would be nearly impossible with the standard all-purpose foot alone.
Different sewing tasks require different levels of pressure, guidance, and spacing. That’s where specialized presser feet come in. While your machine likely came with several feet, knowing when and how to use each one is the key to unlocking your machine’s full potential.
The All-Purpose Presser Foot: Your Starting Point
The all-purpose foot (sometimes called a standard foot or zigzag foot) is the workhorse of your presser foot collection. This is typically the foot that comes pre-installed on your machine, and for good reason—it handles most basic sewing tasks.
What It Looks Like
The all-purpose foot has a wide opening in the center to accommodate both straight and zigzag stitches. The sole (bottom) is flat and smooth, designed to glide over most fabric types without catching or puckering.
When to Use It
- Straight seams on light to medium-weight fabrics
- Basic zigzag stitching
- Simple decorative stitches
- General garment construction
While versatile, the all-purpose foot isn’t ideal for every task. That’s where specialized feet become essential.
Zipper Foot: For Clean, Professional Zipper Installations
The zipper foot is one of the most frequently used specialty feet, and once you understand how it works, you’ll wonder how you ever installed zippers without it.
What Makes It Special
Unlike the all-purpose foot, the zipper foot is narrow and can attach on either the left or right side of your needle. This offset design allows you to stitch extremely close to zipper teeth without the bulk of the foot getting in the way.
Types of Zipper Feet
- Standard zipper foot: Can be positioned on either side of the needle
- Adjustable zipper foot: Slides left or right for even more precise positioning
- Invisible zipper foot: Has grooves underneath to hold invisible zipper coils in place
Practical Applications
- Installing centered, lapped, or exposed zippers
- Sewing piping and cording
- Stitching close to thick seams or raised edges
- Adding decorative trims near edges
The zipper foot is indispensable for garment sewing and home decor projects. Even if you’re not installing zippers yet, you’ll use this foot for countless other tasks.
Walking Foot: The Secret to Professional Quilting and Layered Fabrics
The walking foot (also called an even-feed foot) is a game-changer for anyone working with multiple layers, stretchy fabrics, or materials that tend to shift during sewing.
How It Works
While standard presser feet rely solely on your machine’s bottom feed dogs to move fabric, the walking foot has its own set of feed dogs on top. These upper feed dogs work in tandem with the lower ones, feeding both layers of fabric through at exactly the same rate.
When You Need It
- Quilting: Prevents puckering and shifting when sewing through multiple layers
- Matching plaids and stripes: Keeps patterns perfectly aligned
- Knit fabrics: Prevents stretching and wavy seams
- Slippery fabrics: Controls silks, satins, and other fabrics that slide
- Thick materials: Helps with denim, canvas, and upholstery fabrics
Investment Worth Making
The walking foot is often sold separately rather than included with your machine, but it’s one of the best investments you can make. If you plan to quilt, work with knits, or sew with difficult fabrics, consider this an essential rather than optional accessory.
Buttonhole Foot: Consistent, Professional Buttonholes Every Time
Creating buttonholes by hand or with a standard foot can be intimidating, but the buttonhole foot makes the process remarkably simple and consistent.
What Makes It Different
Most buttonhole feet have markings or adjustable guides that let you set the exact size of your buttonhole. Many also have a raised section on the back where you can clip your button, automatically creating a buttonhole the perfect size for that specific button.
Types of Buttonhole Feet
- 4-step buttonhole foot: Requires you to manually change stitch settings for each step
- 1-step buttonhole foot: Automatically creates the entire buttonhole in one continuous motion
- Automatic buttonhole foot: Measures the button and creates a perfectly sized buttonhole
Pro Tips for Perfect Buttonholes
- Always test on scrap fabric with the same number of layers as your project
- Use interfacing behind buttonholes for stability
- Mark buttonhole placement carefully before you begin
- Keep the same button clipped to the foot for consistent sizing throughout a garment
Blind Hem Foot: Invisible Hems Without Hand Sewing
The blind hem foot creates nearly invisible hems on garments, curtains, and other projects—perfect when you want a professional finish without visible stitching on the right side of the fabric.
How It Functions
This foot has a metal guide that sits along the fold of your fabric. As you sew, the needle catches just a few threads of the folded fabric, creating a hem that’s barely visible from the outside.
Mastering the Technique
Blind hemming takes practice, but the results are worth it:
- Fold and press your hem to the desired length
- Fold the hem back on itself, leaving about 1/4 inch of the hem edge exposed
- Position the fabric so the guide sits along the fold
- The straight stitches sew on the hem allowance, and occasional zigzag stitches catch the folded garment
This presser foot is particularly valuable for dress pants, skirts, curtains, and anywhere you want a professional, nearly invisible hem.
Overcasting Foot: Clean Edges Without a Serger
Not everyone has a serger (overlock machine), but the overcasting foot brings similar edge-finishing capabilities to your standard sewing machine.
Design Features
The overcasting foot has a small brush or pin along one edge. This guide ensures your zigzag or overcast stitch wraps around the raw edge of the fabric rather than pulling it and causing puckering or tunneling.
When to Use It
- Finishing seam allowances to prevent fraying
- Creating clean edges on knit fabrics
- Seaming and finishing in one step
- Projects where a serged edge isn’t necessary but raw edges need finishing
Stitch Selection
Pair the overcasting foot with:
- Overcast stitches (if your machine has them)
- 3-step zigzag
- Standard zigzag (adjust width and length for best results)
Gathering Foot: Effortless Ruffles and Gathers
Creating gathers by hand—basting two rows and pulling threads—works, but it’s time-consuming and can result in uneven fullness. The gathering foot automates this process.
How It Creates Gathers
The gathering foot has a raised section underneath that causes the fabric to bunch up as it feeds through the machine. By adjusting your stitch length and tension, you can control the fullness of the gathers.
Creative Applications
- Ruffled skirts and sleeves
- Gathered curtain headers
- Prairie points and decorative edges
- Attaching gathered fabric to flat fabric in one step (some models)
Adjusting Gather Density
- Longer stitch length: Fuller, tighter gathers
- Increased upper tension: More pronounced gathering
- Slower sewing speed: More control over gather consistency
Choosing the Right Presser Foot: Quick Reference Guide
Understanding the types of presser feet is one thing—knowing what presser foot to use for your specific project is another. Here’s a quick decision guide:
For Garment Construction
- General seams: All-purpose foot
- Zippers and piping: Zipper foot
- Hems: Blind hem foot or all-purpose foot
- Buttonholes: Buttonhole foot
- Edge finishing: Overcasting foot
For Home Decor
- Curtains with gathers: Gathering foot
- Pillows with piping: Zipper foot
- Quilted cushions: Walking foot
- Hemmed edges: Blind hem foot
For Quilting
- Piecing blocks: 1/4-inch foot (specialized quilting foot)
- Quilting layers: Walking foot
- Free-motion quilting: Free-motion or darning foot
For Difficult Fabrics
- Knits and stretchy fabrics: Walking foot
- Slippery fabrics (silk, satin): Walking foot
- Multiple layers: Walking foot
- Thick fabrics (denim, canvas): Walking foot or all-purpose with adjusted pressure
Maintaining Your Presser Feet for Longevity
Quality presser feet are investments that should last for years with proper care:
Regular Cleaning
- Remove lint and thread from the underside after each project
- Use a small brush to clean around the needle opening
- Wipe metal feet with a soft, dry cloth
- Avoid using harsh chemicals that could damage plastic components
Storage Solutions
- Keep feet in their original case or a dedicated organizer
- Label each compartment so you can quickly find the right foot
- Store away from moisture to prevent rust on metal feet
- Keep instruction sheets with your feet for reference
When to Replace
- Grooves or scratches on the sole that could snag fabric
- Loose or wobbly attachment points
- Cracks in plastic feet
- Bent or damaged guide rails
Building Your Presser Foot Collection
As a beginner, you don’t need every specialty foot immediately. Start with these essentials:
Priority 1: Included with Most Machines
- All-purpose foot
- Zipper foot
- Buttonhole foot
Priority 2: Early Additions
- Walking foot (if not included)
- Blind hem foot
- Overcasting foot
Priority 3: As Your Skills Grow
- Gathering foot
- 1/4-inch foot (for quilting)
- Rolled hem foot
- Free-motion quilting foot
- Bias binding foot
Purchase specialty feet as you need them for specific projects. This spreads out the cost and ensures you’re investing in tools you’ll actually use.
Compatibility: Ensuring Your Presser Feet Fit Your Machine
Not all presser feet are universal. Before purchasing additional feet, you need to know your machine’s attachment system:
Common Attachment Systems
- Low shank: Most common for domestic machines (Brother, Singer, most Janome models)
- High shank: Some older machines and certain brands
- Slant shank: Vintage machines, particularly older Singers
- Snap-on: Most modern machines use snap-on feet with a universal shank adapter
- Screw-on: Older attachment method requiring screwing each foot onto the shank
How to Identify Your System
Check your machine’s manual, measure the distance from the bottom of the presser foot holder to the needle plate (low shank is about 1/2 inch), or look at the attachment mechanism on your current feet.
Many manufacturers sell conversion shanks that allow you to use low-shank feet on different machines, expanding your options significantly.
Common Mistakes to Avoid
Even with the right presser foot, beginners often make these mistakes:
Using the Wrong Foot for the Fabric
Heavy fabrics need presser feet that can handle thickness (walking foot), while delicate fabrics need gentle pressure and smooth soles (all-purpose or specialty feet).
Not Testing First
Always test a new presser foot on scrap fabric before using it on your project. This helps you understand how it feeds, what stitch settings work best, and whether you need to adjust pressure or tension.
Ignoring Presser Foot Pressure
Most machines allow you to adjust presser foot pressure. Too much pressure can distort knits or thin fabrics; too little can cause uneven feeding. Experiment with the pressure dial when changing fabrics or feet.
Forgetting to Change the Needle Position
Some presser feet work best with the needle in a specific position (left, center, or right). Check your manual and adjust accordingly.
Sewing Too Fast
Specialty feet often require slower sewing speeds for best results, especially when you’re learning to use them. Take your time.
Expanding Your Skills with Presser Feet
Once you’ve mastered the essential feet covered in this sewing machine presser feet guide, your sewing possibilities expand exponentially. Each presser foot opens up new techniques and projects that would be difficult or impossible with just the all-purpose foot.
The key is to practice with each foot on scrap fabric before committing to a project. Understand how adjusting tension, stitch length, and presser foot pressure affects the results. Keep notes about successful settings for different fabric types—this reference will save you time and frustration on future projects.
Don’t be intimidated by the variety of presser feet available. Start with the essentials, learn them thoroughly, and add specialty feet as your projects demand them. Before long, swapping presser feet will become second nature, and you’ll instinctively know what presser foot to use for any sewing task.