
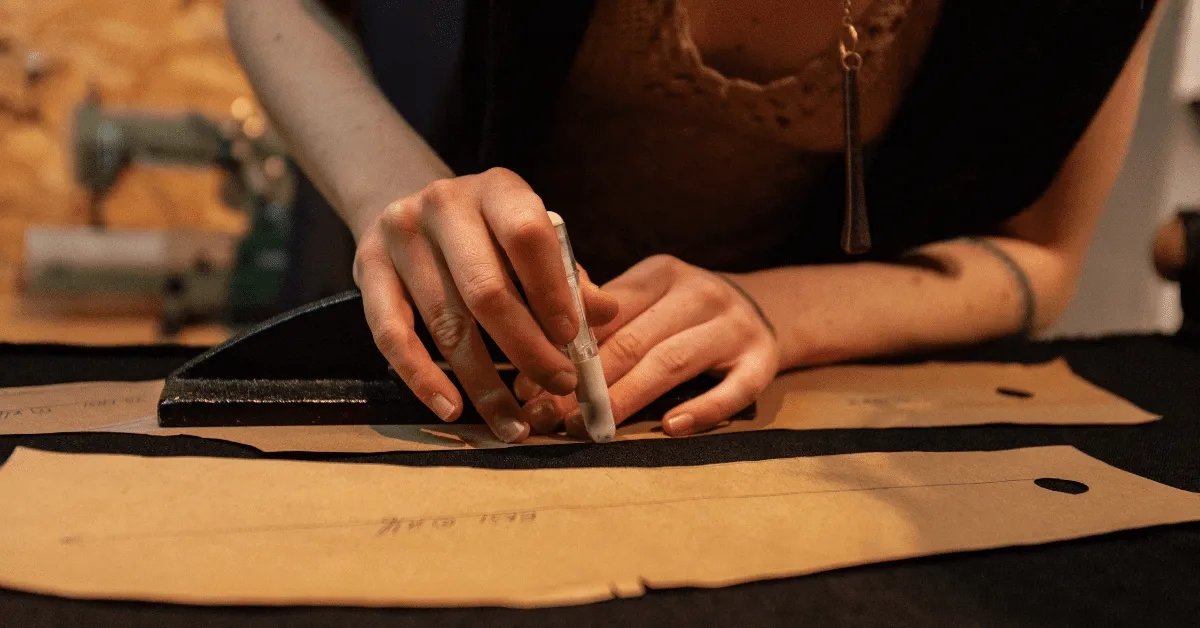
Transferring pattern markings to fabric is one of the most critical steps in sewing. Whether you’re working with commercial patterns or creating your own designs, accurate marking ensures professional results and saves you from costly mistakes. This comprehensive guide covers the best marking tools in sewing and proven techniques to transfer pattern markings with precision.
Why Pattern Markings Matter
Pattern markings indicate crucial information like dart placements, buttonhole positions, pocket placements, and notches. Missing or inaccurate markings can throw off the entire garment construction, leading to misaligned seams, asymmetrical details, or ill-fitting pieces.
Professional sewists know that the time invested in careful marking pays off throughout the construction process. Clear, accurate marks serve as your roadmap, especially when working with complex patterns or multiple pattern pieces.
Essential Marking Tools in Sewing
The right marking tool depends on your fabric type, project requirements, and personal preference. Here are the most reliable options:
Tailor’s Chalk
Tailor’s chalk remains a classic choice for good reason. Available in triangle shapes, pencil form, or as chalk wheels, this tool creates visible marks that brush away easily when you’re finished.
Best for: Wool, cotton, linen, and most medium to heavyweight fabrics
Pros:
- Easily removable without washing
- Works on both light and dark fabrics (choose contrasting colors)
- Inexpensive and widely available
- No risk of permanent staining
Cons:
- Can rub off during handling before you’re ready
- May not show well on textured or fuzzy fabrics
- Requires frequent sharpening if using pencil-style chalk
The chalk wheel (or pounce wheel) deserves special mention. When used with powdered chalk, it creates dotted lines that are perfect for marking curved seams and intricate details.
Water-Soluble Fabric Pens
These modern marking tools have revolutionized pattern transfer. Water-soluble pens (also called fabric markers or disappearing ink pens) create crisp, visible lines that vanish with water or air exposure.
Best for: Cotton, synthetic blends, quilting fabrics
Types:
- Water-soluble: Marks disappear when dabbed or washed with water
- Air-soluble: Marks fade automatically within 24-48 hours
- Heat-erasable: Marks vanish when pressed with an iron
Pros:
- Creates precise, fine lines
- Excellent visibility on light-colored fabrics
- Perfect for detailed work
- No residue when properly removed
Cons:
- Test first—some dyes may react with the ink
- Air-soluble marks may fade before you finish
- Not suitable for fabrics that can’t get wet
- Heat from ironing can sometimes set water-soluble marks permanently
When comparing sewing chalk vs fabric pens, consider your timeline and fabric. Chalk works better if you need marks to stay visible over several days, while pens excel for same-day projects requiring precision.
Dressmaker’s Carbon Paper and Tracing Wheel
This duo creates marks by transferring colored wax from carbon paper to fabric using a serrated wheel. It’s the go-to method for transferring complex pattern details quickly.
Best for: Multi-layer marking, smooth fabrics, commercial pattern work
How to use:
- Place fabric right side down on a hard surface
- Position carbon paper waxy-side down on fabric wrong side
- Lay pattern piece on top
- Roll tracing wheel firmly along pattern lines
Pros:
- Marks both fabric layers simultaneously
- Fast for complex patterns
- Creates continuous lines
- Works on most smooth fabrics
Cons:
- Marks may not wash out completely (always use on wrong side)
- Can leave holes in delicate fabrics
- Doesn’t work well on thick or textured fabrics
- Requires purchasing special carbon paper
Fabric Marking Pencils
These specialized pencils come in various types, from traditional graphite to white, silver, and colored options.
Best for: Dark fabrics, detail work, temporary marking
Pros:
- Precise control for small details
- Variety of colors for different fabrics
- Some types are water-soluble
- Affordable and long-lasting
Cons:
- Graphite may not wash out completely
- Requires sharpening
- Can be less visible on some fabrics
Thread Basting
The most traditional method involves using contrasting thread to hand-sew temporary marks through pattern and fabric layers.
Best for: Haute couture work, delicate fabrics, bridal wear, tailoring
Pros:
- Works on any fabric type
- Completely removable with no residue
- Won’t damage delicate materials
- Marks stay in place during construction
Cons:
- Time-consuming
- Requires hand-sewing skill
- Must be removed carefully to avoid pulling fabric threads
How to Transfer Pattern Markings: Step-by-Step Methods
Method 1: Direct Marking with Chalk or Pen
This straightforward technique works when you can mark directly on the fabric’s wrong side.
- Pin your pattern securely to fabric, ensuring all layers are smooth
- Choose your marking tool based on fabric type
- Mark through pattern holes or around pattern edges at key points
- Remove pattern carefully
- Connect dots if needed to complete shapes
Pro tip: For symmetrical pieces like collars or cuffs, mark one side, fold on the centerline, and transfer marks to the opposite side for perfect symmetry.
Method 2: Carbon Paper Transfer
Ideal for transferring multiple markings quickly and accurately.
- Prepare your workspace with a hard, smooth surface
- Layer materials: fabric (wrong side up), carbon paper (waxy side down), pattern
- Secure with weights or pins outside marking areas
- Trace all markings firmly with a tracing wheel or stylus
- Check transfer quality before removing pattern
- Repeat for second layer if marking two pieces simultaneously
Important: Always test carbon paper on a fabric scrap first. Some colors may be difficult to remove.
Method 3: Needle Marking (Tailor’s Tacks)
Perfect for delicate fabrics and couture sewing.
- Thread a needle with contrasting thread (don’t knot it)
- Stitch through pattern and all fabric layers at marking points
- Leave long loops on top (about 1 inch)
- Take a second stitch in the same spot
- Clip threads between loops
- Gently separate fabric layers and snip threads between them
- Remove pattern carefully, leaving thread tufts in fabric
Method 4: Snip Marking
A quick method for notches and certain edge markings.
- Identify notch locations on pattern
- Make tiny clips (⅛ inch maximum) into seam allowance
- Never cut beyond seam line
Caution: Only use on stable, woven fabrics. Avoid on knits or fabrics that fray easily.
Choosing the Right Method for Your Fabric
Different fabrics require different approaches:
Delicate fabrics (silk, chiffon, organza): Thread basting or air-soluble pens Dark fabrics (black wool, dark denim): White or silver pencils, light-colored chalk Fuzzy fabrics (fleece, flannel, terry cloth): Fabric clips at edges, thread basting for interior marks Leather or vinyl: Tape on wrong side, chalk, or specialized leather markers Knits (jersey, interlock): Water-soluble pens, soap slivers, or tailor’s chalk Quilting cotton: Any method works; water-soluble pens are most popular
Best Practices for Accurate Pattern Transfer
- Always test first: Mark a scrap of your project fabric to ensure marks remove properly
- Work on a hard surface: Soft surfaces absorb pressure and create unclear marks
- Pin strategically: Secure patterns thoroughly but avoid pinning through marking areas
- Mark the wrong side: Whenever possible, place marks where they won’t show
- Use contrasting colors: Ensure your marks are clearly visible while you work
- Transfer immediately: Mark fabric as soon as you cut pieces to avoid confusion
- Keep patterns organized: Label and store used patterns for future reference
- Double-check: Verify all marks are transferred before removing patterns
Common Mistakes to Avoid
Skipping the test: Always test marking tools on scraps before marking your actual project Using permanent markers: Regular pens or Sharpies can bleed and never wash out Pressing over marks: Heat can set some marking materials permanently Marking the right side: Unless necessary, keep all marks on the wrong side Rushing the process: Accurate marking takes time but prevents major headaches later Ignoring grain lines: Transfer and follow grain line markings for proper drape Forgetting seam allowances: Mark both cutting lines and stitching lines when needed
Removing Marks After Sewing
Different marking tools require different removal methods:
Tailor’s chalk: Brush away with a soft brush or damp cloth Water-soluble pens: Dab with a wet cloth or wash according to fabric care instructions Air-soluble pens: Allow to fade naturally (usually 24-48 hours) Carbon paper: May require washing; some colors are more permanent Thread basting: Carefully clip and remove threads Pencil marks: Usually wash out; may require gentle spot treatment
Always remove marks before pressing when possible, as heat can set certain marking materials permanently.
Advanced Tips for Professional Results
For matching points: Use a pin to mark directly through both layers at matching points, then mark each layer where the pin exits
For plaids and stripes: Use thread basting to ensure pattern matching across seams
For multiple identical pieces: Create a template from template plastic or cardboard with holes punched at key points
For curves: Use a combination of dots and short dashes rather than trying to draw continuous curved lines
For bias-cut fabrics: Let fabric hang for 24 hours before marking to allow it to settle
For napped fabrics (velvet, corduroy): Mark from the top surface using pins, then carefully flip to mark wrong side
Troubleshooting Pattern Marking Issues
Marks not showing up: Switch to a contrasting color or different marking tool Marks disappearing too quickly: Use tailor’s chalk instead of air-soluble pens Marks won’t come out: Test removal methods on scraps; may require professional cleaning Marks bleeding through: Use lighter pressure or switch to a different marking method Pattern shifting during marking: Add more pins or use pattern weights Can’t see pattern markings: Use a light box or window to illuminate pattern symbols