
Sewing knit fabrics can feel intimidating without a serger, but the truth is that you can achieve professional-looking results using just your regular sewing machine. With the right needles, stitches, and techniques, you’ll be able to tackle everything from t-shirts to activewear with confidence.
Understanding Knit Fabrics
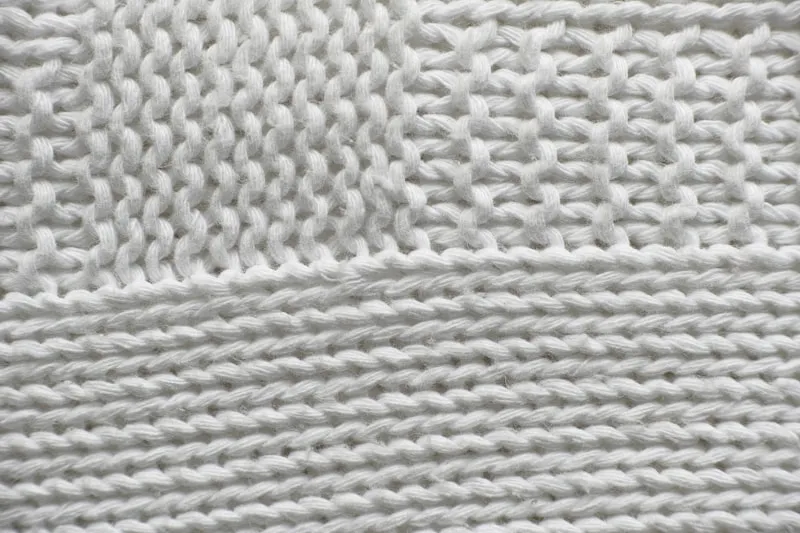
Knit fabrics are constructed differently from woven fabrics. Instead of threads interlacing at right angles, knits are made from loops of yarn that interlock. This construction gives knits their characteristic stretch and recovery, making them comfortable and flexible.
Common types of knit fabrics include:
- Jersey knit: Single-knit fabric with a smooth right side and slightly textured wrong side
- Interlock: Double-knit with identical sides, more stable than jersey
- Ribbing: Highly elastic knit with vertical ribs, often used for cuffs and neckbands
- French terry: Knit with loops on the wrong side, absorbent and comfortable
- Ponte: Stable double-knit with minimal stretch, suitable for structured garments
- Spandex blends: Knits with added elastane for extra stretch and recovery
The amount of stretch varies significantly between different knit fabrics, which affects how you sew them and what projects they’re suitable for.
Essential Tools for Sewing Knit Fabric
Ballpoint or Stretch Needles
The most critical tool for sewing stretch fabric with a regular machine is the right needle. Ballpoint needles have a rounded tip that slides between the fabric’s loops rather than piercing through them. This prevents skipped stitches and fabric damage.
- Ballpoint needles (SUK): Best for most knits like jersey and interlock
- Stretch needles (SES): Feature a special scarf design for highly elastic fabrics like spandex blends
- Size recommendations: 70/10 for lightweight knits, 80/12 for medium-weight, 90/14 for heavy knits
Replace your needle after 6-8 hours of sewing or when you notice skipped stitches, as dull needles can damage delicate knit fibers.
Thread Selection
Use polyester or poly-cotton blend thread for sewing knits. These threads have slight elasticity that allows seams to stretch with the fabric. Avoid 100% cotton thread, which can break when the seam is stretched.
For best results, match your thread color to your fabric or go one shade darker.
Additional Helpful Tools
- Walking foot: Helps feed both layers evenly, preventing stretching
- Twin needle: Creates professional-looking hems with parallel topstitching
- Rotary cutter and mat: Cuts knits more accurately than scissors
- Jersey clips or Wonder Clips: Hold fabric without creating holes like pins might
- Washable fabric marker: Mark without damaging the fabric
How to Sew Knit Fabric: Essential Stitches
Your regular sewing machine likely has several built-in stitches perfect for knits. The key is choosing stitches that can stretch with the fabric without breaking.
Narrow Zigzag Stitch
This is the most versatile stitch for knits. Set your machine to:
- Stitch width: 1-1.5mm
- Stitch length: 2.5-3mm
The narrow zigzag allows the seam to stretch while providing adequate strength. Use this for most seams on knit projects.
Three-Step Zigzag (Elastic Stitch)
This stitch creates three small stitches for each zigzag, making it stronger and more elastic than a regular zigzag. It’s excellent for:
- Attaching elastic
- Sewing swimwear or activewear
- High-stress seams like crotch seams
Stretch Stitch
Most modern machines have a dedicated stretch stitch (often looks like a lightning bolt icon). This stitch sews forward and backward simultaneously, creating a strong, elastic seam. It’s ideal for:
- Side seams on t-shirts
- Shoulder seams
- Any seam that needs maximum strength and stretch
Straight Stretch Stitch
This stitch appears as a straight line but builds in stretch by sewing two stitches forward and one backward. Use it when you want seams that look straight but still stretch.
Twin Needle Hem
A twin needle creates two parallel rows of straight stitching on the right side with a zigzag on the wrong side, mimicking the look of a coverstitch machine. This is perfect for:
- T-shirt hems
- Sleeve hems
- Neckline topstitching
Set your machine to straight stitch with a 2.5-3mm length and slightly reduced tension.
Stretch Stitch Settings and Adjustments
Getting the perfect stitch on knits often requires some experimentation. Here are the key settings to adjust:
Presser Foot Pressure
Reduce your presser foot pressure if your machine allows it. Too much pressure can stretch the fabric as it feeds under the foot, causing wavy seams. Start at medium pressure and adjust as needed.
Thread Tension
Slightly reduce your upper thread tension (lower number) when sewing knits. If your stitches are puckering or the fabric is tunneling, your tension is too tight. Test on fabric scraps until the stitches lie flat.
Stitch Length
Longer stitches (3-3.5mm) generally work better on knits than shorter ones. Shorter stitches can cause the fabric to stretch and create wavy seams.
Differential Feed
If your machine has differential feed, set it to 0.7-0.8 to prevent stretching as the fabric feeds through.
Techniques for Success
Stabilizing Seams
Some seams, like shoulders, shouldn’t stretch. Stabilize them by:
- Sewing a strip of clear elastic or Stay Tape into the seam
- Using a strip of lightweight fusible interfacing
- Sewing with a piece of tissue paper that tears away after stitching
Preventing Wavy Seams
Wavy, stretched-out seams are the most common problem when learning how to sew knit fabric. Prevent them by:
- Not pulling or pushing the fabric through the machine—let the feed dogs do the work
- Using a walking foot to feed both layers evenly
- Placing fabric under the presser foot without tension
- Starting seams with the fabric lying flat on the machine bed
Handling the Fabric
Knits are slippery and stretchy, which makes them challenging to cut and handle:
- Cutting: Let fabric relax for 24 hours before cutting. Use pattern weights and a rotary cutter instead of pinning and using scissors
- Pinning: Pin within the seam allowance perpendicular to the seam, or use clips instead of pins
- Pressing: Use steam carefully—too much heat can stretch knits. Press with an up-and-down motion rather than sliding the iron
Starting and Ending Seams
Knit fabrics can get pulled down into the feed dogs at the start of a seam. Prevent this by:
- Starting seams 1/4 inch from the fabric edge, then backstitching to the edge
- Using a scrap piece of fabric as a “leader” before starting your actual seam
- Holding both thread tails behind the presser foot as you begin
Professional Finishing Techniques
Hemming Knits
The hem is often what separates a homemade-looking garment from a professional one. Try these methods:
Twin Needle Hem: The easiest method that looks most professional. Use a 2.5mm or 4mm twin needle depending on your desired spacing.
Coverstitch Alternative: If you don’t have a coverstitch machine, use your twin needle on the right side and a wide zigzag over the raw edge on the wrong side before topstitching.
Lettuce Edge: For a decorative finish on lightweight knits, use a narrow zigzag while gently stretching the fabric edge as you sew. The edge will ripple when released.
Band Hem: Cut a strip of self-fabric or ribbing, sew into a circle, then attach to the hem opening with a stretch stitch.
Necklines and Edges
Self-Fabric Binding: Cut 1-1.5 inch strips on the crossgrain (maximum stretch), fold in half lengthwise, and sew to the neckline with a stretch stitch while slightly stretching the binding.
Ribbing: Cut ribbing 75-80% of the opening measurement for a snug fit. Divide both pieces into quarters, match marks, and sew while stretching the ribbing to fit.
Fold-Over Elastic: This specialized elastic creates a clean, professional edge on activewear and children’s clothing. Encase the fabric edge within the folded elastic and straight stitch or zigzag through all layers.
Troubleshooting Common Problems
Skipped Stitches
If your machine skips stitches when sewing knits:
- Change to a fresh ballpoint or stretch needle
- Slow down your sewing speed
- Reduce presser foot pressure
- Slightly increase thread tension
- Try a walking foot to improve fabric feeding
Fabric Getting Eaten by the Machine
When knit fabric gets pushed down into the bobbin area:
- Switch to a straight stitch throat plate if your machine has one
- Start seams with a fabric scrap as a leader
- Hold thread tails taut as you begin sewing
- Reduce presser foot pressure
Wavy or Stretched Seams
If seams look rippled or stretched after sewing:
- Don’t pull the fabric through—guide it gently
- Reduce presser foot pressure
- Use a walking foot
- Increase stitch length
- Check that you’re not stretching the fabric while pinning or cutting
Tunneling or Puckering
When the fabric forms a tunnel around the stitching line:
- Reduce upper thread tension
- Use a longer stitch length
- Switch to a finer needle
- Try a narrower zigzag width
- Ensure you’re using appropriate thread (polyester, not cotton)
Practice Projects for Beginners
Start with these forgiving projects to build your confidence with sewing stretch fabric:
- Infinity scarf: Simple tube construction, perfect for practicing seams and stretchy hems
- Baby or toddler leggings: Small, quick project with elastic waist
- T-shirt from a pattern: Choose a pattern designed for beginners with clear instructions
- Headband: Practice sewing curves and turning knit tubes right-side-out
- Lounge pants: Larger project but simple construction, great for practicing elastic insertion
Choose stable knits like ponte or interlock for your first projects rather than very stretchy jerseys.
Tips for Specific Knit Projects
T-Shirts
- Stabilize shoulder seams with clear elastic or tape
- Use a twin needle for hems and neckline topstitching
- Finish seam allowances together with a narrow zigzag to prevent rolling
- Press seams to one side rather than open
Leggings and Activewear
- Use a stretch needle (not just ballpoint) for high-spandex fabrics
- Sew seams with a three-step zigzag or stretch stitch
- Use fold-over elastic at the waistband for a professional finish
- Topstitch with a twin needle for a coverstitch appearance
Swimwear
- Use polyester thread designed for stretch fabrics
- Sew all seams with three-step zigzag
- Use swim elastic specifically designed for chlorine exposure
- Consider a narrow zigzag for elastic insertion rather than straight stitching
Knit Dresses
- Interface button and buttonhole areas with lightweight knit fusible
- Stabilize zippers with narrow strips of fusible interfacing
- Use stay tape on shoulder seams to prevent stretching
- Hem with a twin needle for the most professional appearance
Moving Beyond the Basics
Once you’re comfortable with basic knit sewing, consider these advanced techniques:
Flatlock Seam Imitation
Create the appearance of a flatlock seam by:
- Sewing seam wrong sides together with a narrow zigzag
- Trimming seam allowance close to stitching
- Topstitching on the right side with a triple straight stitch or twin needle
Exposed Seams
For an athletic or deconstructed look:
- Sew seams wrong sides together (seam allowances on the outside)
- Trim to 1/4 inch
- Cover raw edges with a wide three-step zigzag in contrasting thread
Decorative Twin Needle Topstitching
Use decorative twin needles (wing needles or metallic thread) to create pintucks, decorative hems, or design elements on knit garments.